Samsung Galaxy Note 7 is the latest flagship of the South Korean manufacturer. Despite the problems with battery, it is one of the most powerful smartphone on the market today.
If you decide to Root Samsung Galaxy Note 7, we will tell you how to do it.
Root process means that you lose the guarantee, so you should think twice before doing anything (especially if you have new smartphone).
Before starting the process, you should make a copy of all personal data. It is also advisable to charge your phone at least 50%.
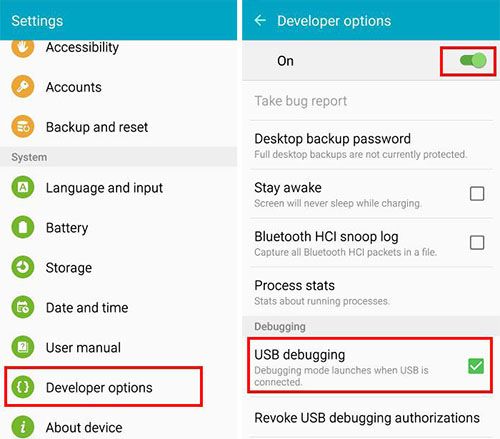
First, you need to enable USB debugging and OEM unlock. To do this, you must open Android settings and look at the bottom “Phone Information” option. Then enter this menu and find build number of Android. Click on it for 7 times and you will have activated “Developer mode”.
After you will see new category in settings menu called “Developer options”. Enter this category and enable two options that we have said: “USB Debugging” and “OEM Unlock”.
Download necessary files to root Samsung Galaxy Note 7
Before continuing, you need to download the drivers for Samsung Galaxy Note 7 and install on your computer.
In addition to the drivers, we must also download the following files:
- SuperSU v2.68 – file required to root the device.
- no-verity-opt-encrypt.zip
- TWRP Recovery
- Odin – software needed to flash the phone.
Once you downloaded these files, copy them to the smartphone memory. Now we are ready to begin the process root Samsung Galaxy Note 7.
How to Root Samsung Galaxy Note 7
How to install TWRP recovery
Once you have followed the above steps, the next thing to do is turn off the phone and turn on again by simultaneously pressing the keys “Volume Down + Home + Power”. You will see a warning sign appears on the screen. Then, release all buttons and press the button “Volume Up” to enter the Download Mode.
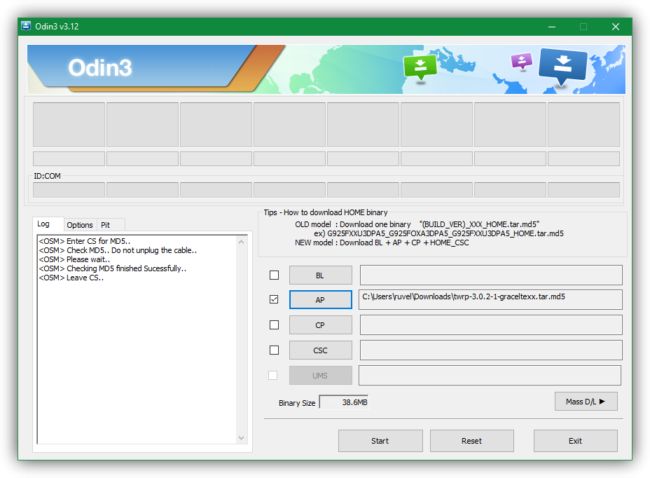
After that, connect Galaxy Note 7 to the computer with USB cable and open Odin program. In this program you will see “AP” and chose “TWRP-3.0.2-1-graceltexx.tar.md5” file. Click on “Start” and wait until complete the process.
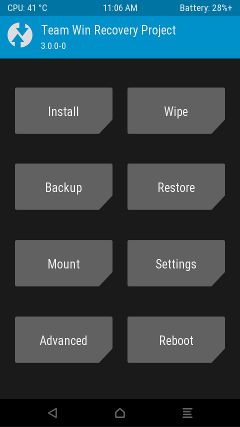
Once the process is complete, press the buttons “Volume Up + Home + Power” and hold then until the phone enters Recovery mode TWRP.
How to install root Samsung Galaxy Note 7
Once in recovery, we look for “Wipe” section, click on it and go to “Advanced Wipe”. There you need to choose “Wipe data”. Slip the button and the device data will be removed to make it ready for root Samsung Galaxy Note 7.
Then go to “Install” section and install “no-verity-opt-encrypt.zip” file. Wait until the installation is completed and finish by clicking on “Reboot System”.
Finally, you need to turn off the device and re-enter the Recovery mode using “Volume Up + Home + Power”. Once inside, you should enter “Install” section and select “SuperSU-v2.68” file. The process may take a few seconds, so wait for it to finish installing correctly.
When the process is finished, you have to restart your smartphone by choosing “Reboot System” option.
That’s all you need to do to root Samsung Galaxy Note 7!
Read another very interesting article about alternative energy of the Sun, water and air.


