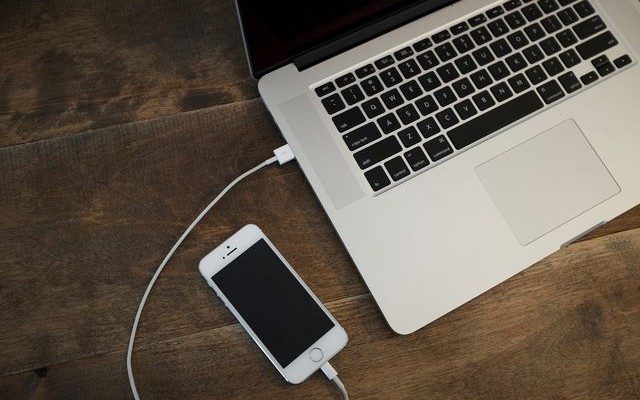
One of the common problems when using iTunes is that the computer does not see connected iPhone or iPad. There may be several reasons, but most often it is because of that Apple devices are stored keys for subsequent authorization. By default, the query “Trust this computer” should appear the next time you connect your smartphone to PC, but the other day the author was faced with the opposite situation, when a user request after the negative response was not repeated. You can solve the problem in a few simple steps.
OS X
Let’s start with the “native” for iOS and iTunes environment – operating system OS X.
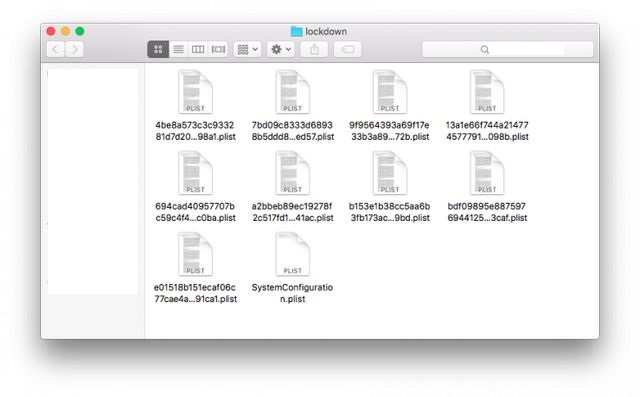
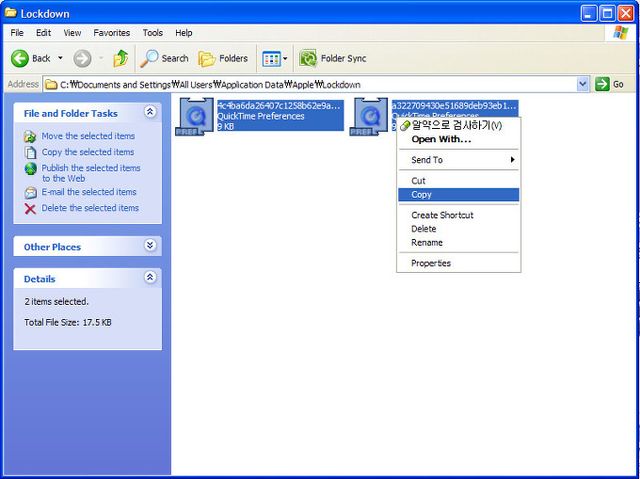
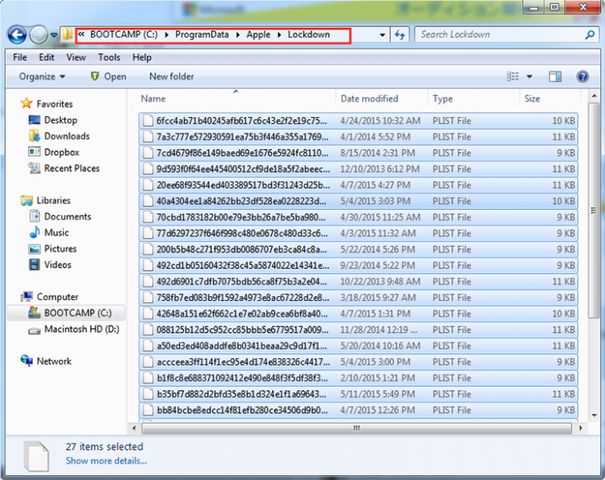
So, if iPhone does not want to trust your Mac, you can try to clear the contents of the special system catalog Lockdown. Disable iOS-device from the computer, perform the shortcut [cmd] + [shift] + [G] and go at /var/db/lockdown/. You will see one or more (depending on the number of synchronized devices) files-certificates, which you need to delete.
After that connect your iPhone and confirm the confidence to the device. Now the smartphone should be determined by computer.
Windows
If you have a computer with operating system Windows, then the procedure remains the same. The only difference here, you need to display hidden files and folders.
Open Control Panel from the “Start” menu and go to the section “Folder” where the tab “View” choose the option of the same name. As for the address, it is different for different versions of Windows.
- Windows XP: C: \ Documents and Settings \ All Users \ Application Data \ Apple \ Lockdown
- Windows 7, Windows 8, Windows 10: C: \ ProgramData \ Apple \ Lockdown
If the above-described manipulation did not solve the problem for Windows there is a more sophisticated way.
- Open “Device Manager”, located in Control Panel in Windows 7 and in “System” in Windows XP.
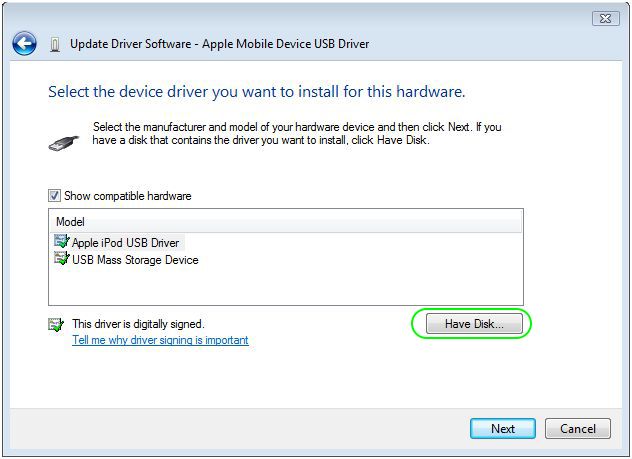
- Right click on the line with the desired Apple’s device, select the item “Update Driver” from the context menu, then “Browse my computer for driver software” and “Select driver from a list of device drivers”.
- Click on “Have Disk” (if it is not available, you can select the category of “Mobile” or “Mass Storage Device” and click the “Next” button, then the button will be displayed).
- In “Install from Disk” dialog box, click on the button “Browse”.
- Go to C: \ Program Files \ Common Files \ Apple \ Mobile Device Support \ Drivers.
- Select the file usbaapl (64-bit editions of Windows, it is called usbaapl64) and click “Open”. If the folder does not exist or it does not contain the file you want, look for it in the directory C: \ Program Files (x86) \ Common Files \ Apple \ Mobile Device Support \ Drivers
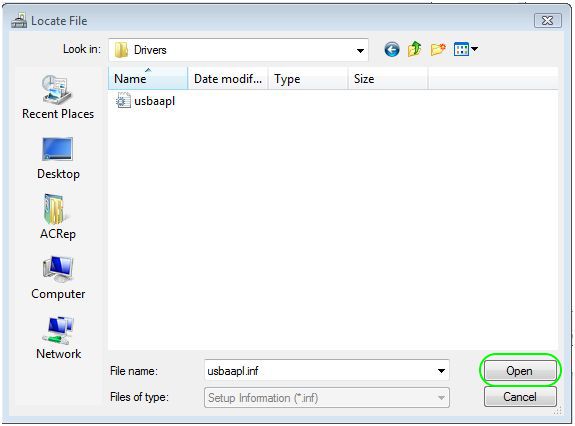
- Click on “OK” button in “Install from Disk” dialog box.
- The final touch – click on “Next” button and complete the driver installation procedure. Now you can open iTunes to check the operation of the device.
Hopefully these tips will help your computer to see iPhone.
Read another very interesting article about alternative energy of the Sun, water and air.

